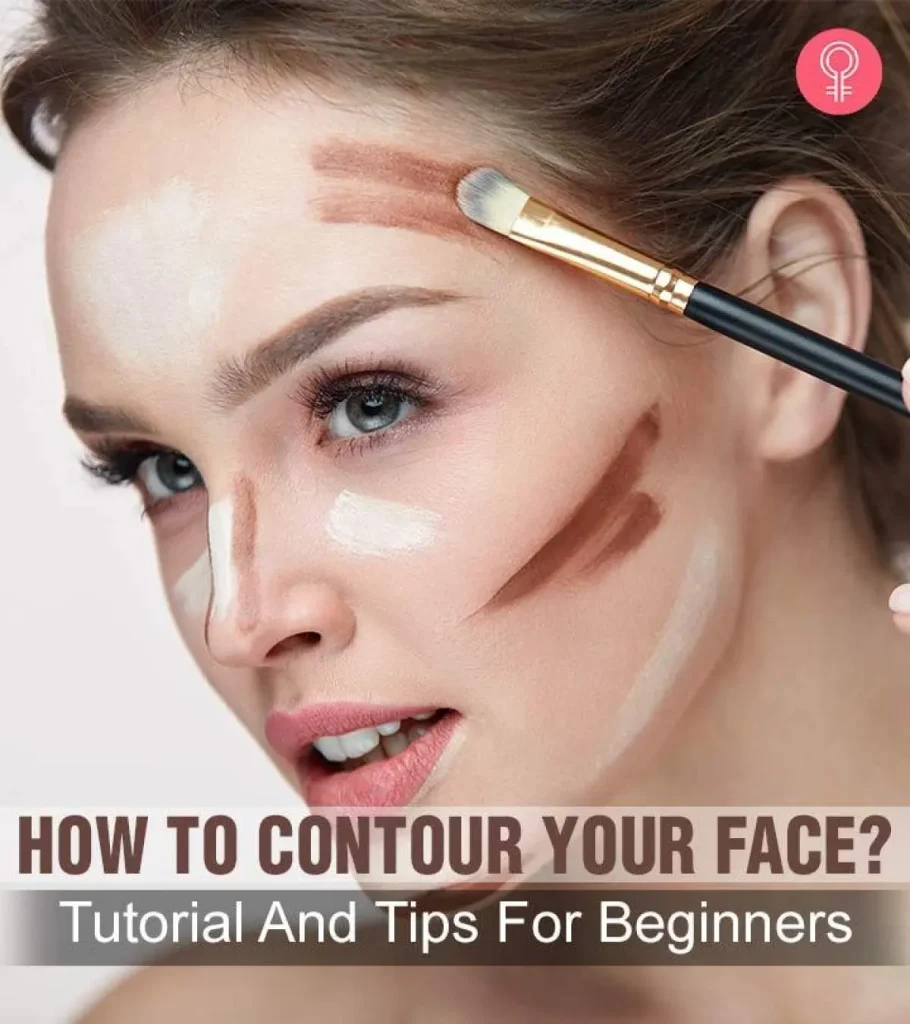
Contouring Techniques to Enhance the Face: Step-by-Step for Beginners

Understanding the Art of Contouring
In recent years, contouring has emerged as a transformative tool in the makeup arsenal, allowing individuals of all skin types and shades to enhance their facial features with ease. This technique relies on the play of light and shadow to sculpt the face, creating flattering angles and a refined appearance. For beginners, mastering contouring might seem challenging, but with the right guidance and a dash of practice, anyone can learn to achieve a polished look.
One primary concern for many newcomers is the complexities involved in contouring. However, simplifying the process can make it accessible to everyone. Here are crucial concepts to consider:
- Complexion Matters: Recognizing your skin tone is the first step in selecting the appropriate contour shades. For warm undertones, opt for golden or peachy shades, while cooler undertones might find taupe or grayish hues more flattering. Many beauty brands offer contour kits specifically tailored to suit different skin tones, making it easier to find your perfect match.
- Tools of the Trade: You don’t need a vast array of tools to begin contouring. A few essentials include a contour brush for applying product, a blending sponge for seamless transitions, and a good quality contour kit or palette. Each item plays a vital role in achieving a natural look that enhances rather than overwhelms.
- Technique is Key: Understanding where to place darker and lighter shades is crucial in shaping your face. For instance, applying a darker shade along the jawline, temples, and sides of the nose creates shadows that define these areas, while highlighting the cheekbones and brow bones brings them forward, giving an impression of lift and definition.
In the United States, contouring has taken on diverse forms, ranging from subtle enhancements suitable for everyday wear to dramatic styles seen on red carpets. Influencers and professional makeup artists alike share their techniques on social media platforms, making this art form more accessible. Popular personalities like Kim Kardashian and makeup artists like Huda Kattan have popularized their unique approaches, inspiring countless individuals to experiment with contouring in their daily routines.
This article will deliver a comprehensive, step-by-step guide detailing various contouring techniques. Whether you seek a fresh, natural appearance for daytime or a bold look for evening events, you will find the tools here to reshape your makeup journey. With confidence, you can navigate the world of contouring and achieve the look you desire, ensuring you feel empowered and radiant in any situation.
DISCOVER: Click here to learn how nutrition can keep your skin youthful
Choosing the Right Contour and Highlighter Shades
Before diving into the actual application of contouring techniques, it’s essential to focus on selecting the right products that will best enhance your unique features. When it comes to contouring, the choice of products can significantly influence the overall outcome.
Here are some tips on how to choose the right contour and highlighter shades:
- Contour Shades: The key is to select a contour shade that is one to two shades darker than your natural skin tone. Look for cream or powder formulas that provide buildable coverage. Cream contours offer a more blended appearance, making them ideal for beginners as they can be easily manipulated. On the other hand, powder contours provide a matte finish that can help in setting makeup for longer wear.
- Highlighter Shades: For highlighting, the shade should be lighter than your skin tone, ideally one to two shades lighter as well. Cream highlighters give a dewy finish, while powders can create a shimmer. Pay attention to undertones—golden highlighters suit warm skin tones, while silver or pearl shades complement cooler complexions.
- Finish Matters: Consider the finish of the products you choose. For a more natural look, select products labeled as “sheer” or “satin.” For those aiming for a glamorous effect, go for more intensely pigmented products that can withstand a night out.
Essential Tools for Contouring
The right tools can make all the difference when it comes to achieving a flawless contour. Having the appropriate makeup brushes and applicators will not only ease the application process but also improve blending, leading to a more natural finish.
Here’s a rundown of essential tools you should consider:
- Contouring Brush: A tapered brush is perfect for applying the contour product to specific areas. This brush type allows for precise placement, making it easier to carve out cheekbones and define the jawline.
- Blending Sponge: A damp beauty sponge is ideal for blending in both cream and liquid products. The bounce of the sponge helps to smooth out harsh lines, providing a seamless transition between highlighted and contoured areas.
- Flat Brush or Fan Brush: For applying highlighter, a flat or fan brush offers versatility. This tool enables you to dust a soft layer of highlighter across the high points of your face, such as the cheekbones, brow bones, and nose for a radiant glow.
With the right shades and tools in hand, you’re one step closer to mastering the art of contouring. As you become comfortable with the application techniques, you’ll gain confidence and begin to customize your approach. Each face is different, and refining your method to highlight your best features is part of the fun!
Understanding Contouring Techniques
Contouring is an art that enables individuals to reshape their faces, emphasizing their best features through shadows and highlights. Beginners may find the plethora of products and techniques overwhelming; however, breaking it down into simple steps can make it accessible for anyone. To effectively enhance your facial structure, understanding the basic principles of shadow and light is crucial.
Step 1: Gather Your Tools
Before diving into the practical application, ensuring you have the right tools is essential. The primary tools include:- Contour Stick or Powder: Typically a few shades darker than your skin tone, aimed at creating shadows.- Highlighter: A lighter product that reflects light, used on areas you wish to accentuate. – Blending Brush or Sponge: Key for achieving a seamless finish and helping to merge the contour with your foundation.
Step 2: Identify Your Face Shape
Each face shape has unique contours to highlight. Observing your facial features will help determine the most effective application areas. For instance:- Oval faces can enhance their cheekbones and jawline.- Round faces may want to create the illusion of length by contouring the sides of the forehead and below the chin.This foundation is pivotal in ensuring that your efforts yield the desired effects and avoid common mistakes.
Step 3: Mapping Out Your Contour
Once you’ve identified your face shape, it’s time to map out where to apply your contour and highlighter. Typically, key areas to focus on include:- The sides of the nose – helps in narrowing its appearance.- The hollows of the cheeks – creates depth.- The jawline – sharpens the overall look.Meanwhile, apply your highlighter on the bridge of the nose, above the cheekbones, and on the Cupid’s bow, drawing attention to these prominent areas.
Step 4: The Application
With your products in hand, start by applying the contour shade first. Use a light hand and blend well; the goal is to create shadows, not harsh lines. Follow up with the highlighter, again ensuring even blending. Practice is key in mastering these techniques, so don’t hesitate to experiment with different products until you find what works best for you. Seeking inspiration from tutorials online can also provide insights into diverse styles and advanced techniques to consider as you grow more confident in your contouring journey.In an increasingly visual world, having the ability to enhance your natural beauty through contouring can lead to heightened self-confidence. Understanding these basic techniques is just the beginning; as you refine your skills, you’ll be able to unlock an array of possibilities in your makeup routine.
Advantages of Contouring Techniques
| Category 1 | Category 2 |
|---|---|
| Enhanced Facial Structure | Contouring creates shadows and highlights that redefine the face’s dimensionality. |
| Increased Confidence | Mastering contouring techniques can boost self-esteem and personal expression. |
With a strong foundation in these contouring basics, beginners can explore more advanced techniques, ensuring they enhance their facial features beautifully and artfully.
DISCOVER MORE: Click here to learn how to keep your makeup flawless
Applying Contour and Highlighter: Step-by-Step Techniques
Now that you’ve selected the right shades and gathered essential tools, it’s time to delve into the actual application of contour and highlighter. Mastering these techniques can elevate your makeup look to new heights, allowing you to enhance your natural beauty and create a striking visage.
Step 1: Preparing the Canvas
Before applying any contour products, start with a clean and well-moisturized face. Apply a primer that suits your skin type to create a smooth base for makeup, ensuring that your contour and highlight will adhere better and last longer throughout the day.
Step 2: Mapping the Face
Understanding where to apply contour and highlighter is crucial. Typically, the areas to contour include:
- Cheekbones: Apply contour just below your cheekbone, starting near your ear and blending towards the corner of your mouth.
- Jawline: Add contour along the jawline to enhance definition—just make sure to blend well.
- Forehead: Contour along the hairline to reduce the appearance of a large forehead.
- Nose: For a slimmer nose, apply contour along the sides and blend well.
For highlighting, apply to the highest points of the face:
- Cheekbones: Dust highlighter on top of the cheekbones for a luminous glow.
- Brow Bones: Highlighting directly under the brow arches will lift the eyes.
- Nose Bridge: A light dash down the center of the nose will create dimension.
- Cupid’s Bow: Applying highlighter on the cupid’s bow gives the lips a fuller appearance.
Step 3: The Application Process
When it comes to actually applying the products, less is more for beginners. Start with a small amount of product and gradually build up for the desired effect. For cream products, use your fingertips or a damp beauty sponge to blend, while for powders, a fluffier brush is ideal.
Start with contouring by placing the product on the designated areas and then blend outwards with circular motions. The goal is to diffuse any harsh lines and create a seamless transition between the contoured and natural skin areas.
Next, add your highlighter. A little goes a long way here; lightly dust it on the high points of your face. Blend gently to ensure it melds beautifully with the rest of your makeup.
One nifty trick is to check your work in natural lighting. This can reveal any areas that need further blending or refining.
Step 4: Setting the Look
To lock in your contour and highlight for the day, finish off your makeup with a setting spray or translucent powder. This will help maintain the integrity of your makeup, preventing it from fading or settling into fine lines. For a more luminous finish, a fine mist of setting spray can enhance the glow created by your highlighter.
These step-by-step techniques will guide you through the process of contouring and highlighting, making it approachable and less intimidating for beginners. As with any makeup technique, practice and patience are key. The more you experiment, the more you’ll discover what works best for your unique features and preferences, allowing you to refine your contouring skills.
DON’T MISS: Click here for essential tips on finding your ideal foundation
Conclusion: Embracing Contouring Techniques for a Beautiful Transformation
As we have explored in this article on contouring techniques to enhance the face, the art of contouring and highlighting can significantly elevate your makeup application, enabling you to accentuate your natural features and achieve a striking look. By following our comprehensive step-by-step guide, beginners can confidently navigate the contouring process, transforming an otherwise daunting task into an enjoyable beauty ritual.
To summarize, the journey begins with preparation; ensuring your skin is clean and primed sets the stage for a flawless application. Understanding the anatomy of your face allows you to map out the perfect areas to contour and highlight, effectively playing with light to create dimension. The application itself requires finesse—always remember that starting small and gradually building product is key to achieving a seamless blend.
Finally, setting your look in place is essential to maintain the fresh and radiant appearance throughout the day. With practice, you’ll find that contouring not only enhances your features but also amplifies your confidence. Explore various products and tools, and don’t shy away from experimenting with different techniques to discover what works best for your unique facial structure.
So, as you continue to develop your skills in contouring and highlighting, remember to enjoy the process. Embrace the learning curve, and allow your creativity to shine through. With each application, you’ll enhance not just your face but also your self-expression, showcasing the beauty that is uniquely yours.
Related posts:
Skincare Product Application Techniques: The Correct Order for Maximum Effectiveness
Makeup Techniques for Sensitive Skin: Gentle Products and Methods
Lipstick Application Techniques: How to Ensure Durability and Perfect Finish
Makeup Techniques for Outdoor Events: Tips for Durability and Style
Highlighter Application Techniques: How to Create Natural and Radiant Glow
Smokey Eye Makeup Techniques: Complete Guide for Different Occasions
Linda Carter is a writer and beauty expert specializing in skincare routines, cosmetic ingredients, and holistic self-care practices. With extensive experience helping individuals achieve healthy, radiant skin and make informed beauty choices, Linda shares her knowledge on our platform. Her goal is to empower readers with practical advice and science-backed strategies for lasting beauty and skin health.